FabFilter Pro-Q 4 online help
Table of contents
FabFilter Pro-Q 4 Help
Introduction
Using FabFilter Pro-Q 4
Full Screen mode, resizing and scaling
Presets
Purchasing FabFilter Pro-Q 4
Support
MIDI Learn
Controlling FabFilter Pro-Q 4's parameters directly with MIDI is very easy using the MIDI Learn feature. With MIDI Learn, you can associate any MIDI controller with any parameter.

Click the MIDI Learn button in the bottom bar to enter MIDI Learn mode. The interface dims and the parameters that can be controlled are highlighted. Each parameter has a small text balloon that displays the associated controller number. Now do the following to associate a controller number with a parameter:
-
Touch the control of the desired parameter in the interface that you wish to control. A red square will mark the chosen parameter.
-
Adjust the slider or knob on your MIDI keyboard or MIDI controller that you want to associate with that parameter.
That's it! The parameter will now be controlled with the MIDI controller. You can now go back to step 1 to associate a different parameter. Note that there is no warning when you associate a different knob with a controller number that is already used. It will just be replaced.
To exit MIDI Learn mode, click the MIDI Learn button again, or click Close at the top of the interface.
Click the small menu drop-down button next to the MIDI Learn button to access the MIDI Learn menu:
- Enable MIDI
This globally turns MIDI control of parameters on or off: useful in hosts that automatically send all MIDI events on a track to all effect plug-ins associated with that track as well. - Clear
This submenu shows all parameter associations and lets you delete individual associations or clear all associations in one step. - Revert
Reverts to the last saved MIDI mapping (or the state when the plug-in was started). - Save
Saves the current MIDI mapping so Revert will go back to this state. The current mapping is automatically saved when closing the plug-in.
Routing MIDI to effect plug-ins
For MIDI Learn to work properly, the plug-in need to actually receive MIDI of course. Depending on your host, it can be quite difficult to route MIDI data to effect plug-ins. Here's how to do it in the most important hosts:
- Pro Tools
Create a new MIDI track. From the MIDI input drop down menu, choose your MIDI device (if not already selected) and from the MIDI output drop down menu, choose FabFilter Pro-Q 4 -> channel 1 for the instance you would like to control. - Logic Pro
Instead of adding FabFilter Pro-Q 4 to one of the insert slots, create a new Instrument Track, and click on the Instrument slot. Then choose AU MIDI-controlled Effects > FabFilter > Pro-Q 4. Now, the plug-in receives MIDI. To get audio into the plug-in, click the 'Side Chain' drop down menu in Logic's plug-in header and choose the actual input track. Next, you can mute that original track, so you only hear the audio through the plug-in. The only downside is that plug-ins with an external side-chain cannot use it anymore. - Ableton Live
First of all, create a new MIDI track. From the 'MIDI from' drop down menu, choose your MIDI device (if not already selected). Then, in the 'MIDI to' drop down menu, choose the Audio track that has FabFilter Pro-Q 4 on it. Note: only the first plug-in on any track can receive MIDI. - Cubase
Simply create a new MIDI track and set its output to the Pro-Q 4 instance you would like to control via MIDI.
Controlling the active EQ band
You can use MIDI Learn in Pro-Q 4 in two ways: either by connecting each knob or slider on your MIDI controller to a specific band (for example connecting it to Band 1 Frequency or Band 3 Gain), or by setting up one set of controls on your MIDI controller to adjust the active band. The advantage of controlling the active band is that you only need a small amount of controls on your MIDI controller. However, this works only while the plug-in interface is open in your DAW.
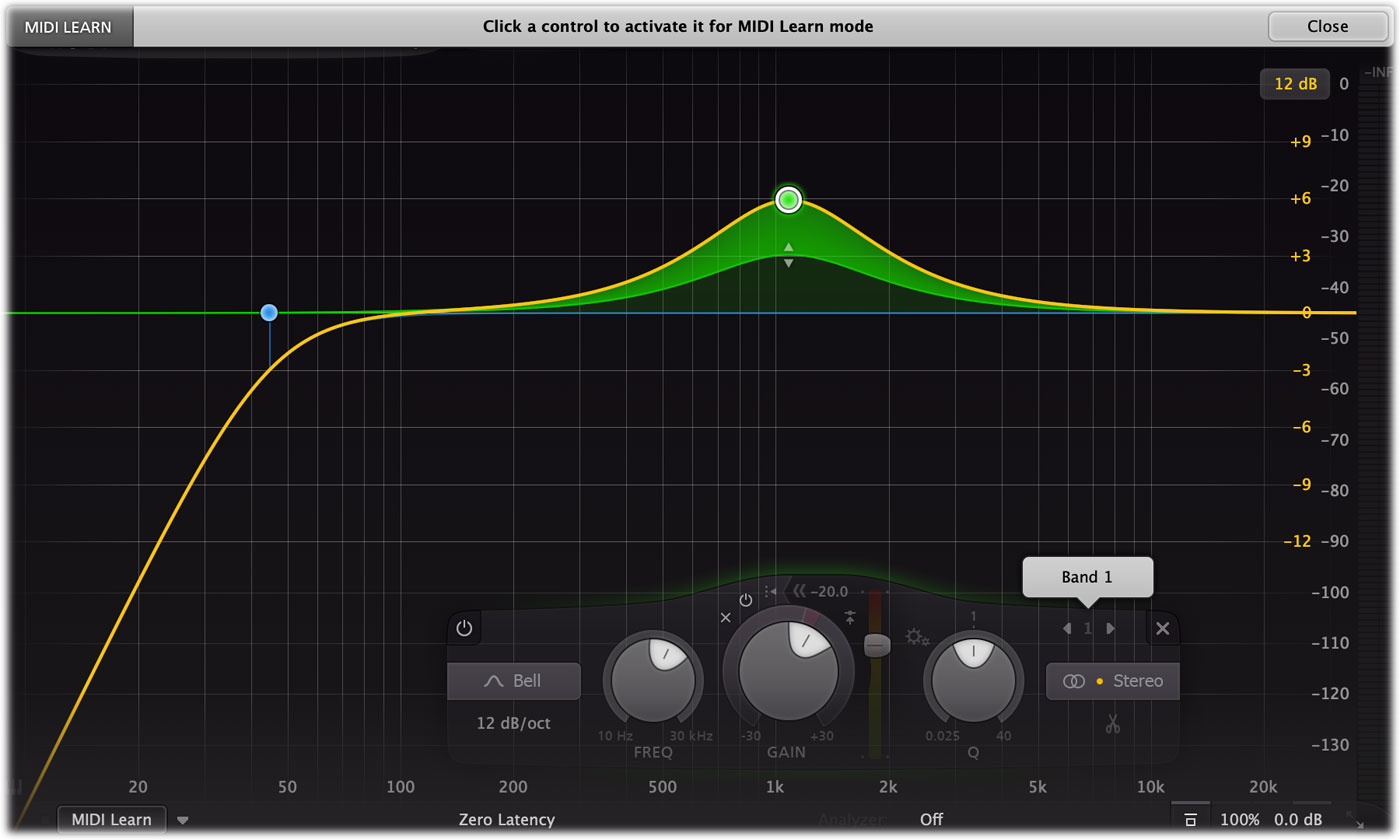
- To associate a knob or slider on your MIDI controller with a specific band, click the band dot for the band you want to control after entering MIDI Learn mode. The band name drop-down input now shows the band number, for example Band 1 (like in the screen shot above). Click on a control in the interface. The bar at the top will show the name of the parameter, for example Band 1 Frequency. Now turn a slider or knob on your MIDI controller to associate it with this parameter.
- To associate a knob or slider on your MIDI controller with the active band, simply don't select a band after entering MIDI Learn mode. The band name drop-down input will show Active Band. Click on a control in the interface right away. The bar at the top shows e.g. Active Band Frequency as the name. Turn a slider or knob on your MIDI controller to make the association.
In active band mode, you can also connect buttons on your MIDI controller to the previous/next band and the delete band buttons in the band controls. The button in the interface will be activated upon receiving a controller message of 127 after a previous lower value from the MIDI controller. This allows you to activate a band directly from your MIDI controller.
Note that you can use the band name drop-down input to switch between any specific band or active band mode.
Next: Undo, redo, A/B switch
See Also
Overview
